Inchindown Fuel Depot - Secondary Portal Exploration
A return visit was made to Inchindown on 22/09/03. A new lock had been
fitted to the main portal, but the secondary portal was still open, and
a full penetration was effected.
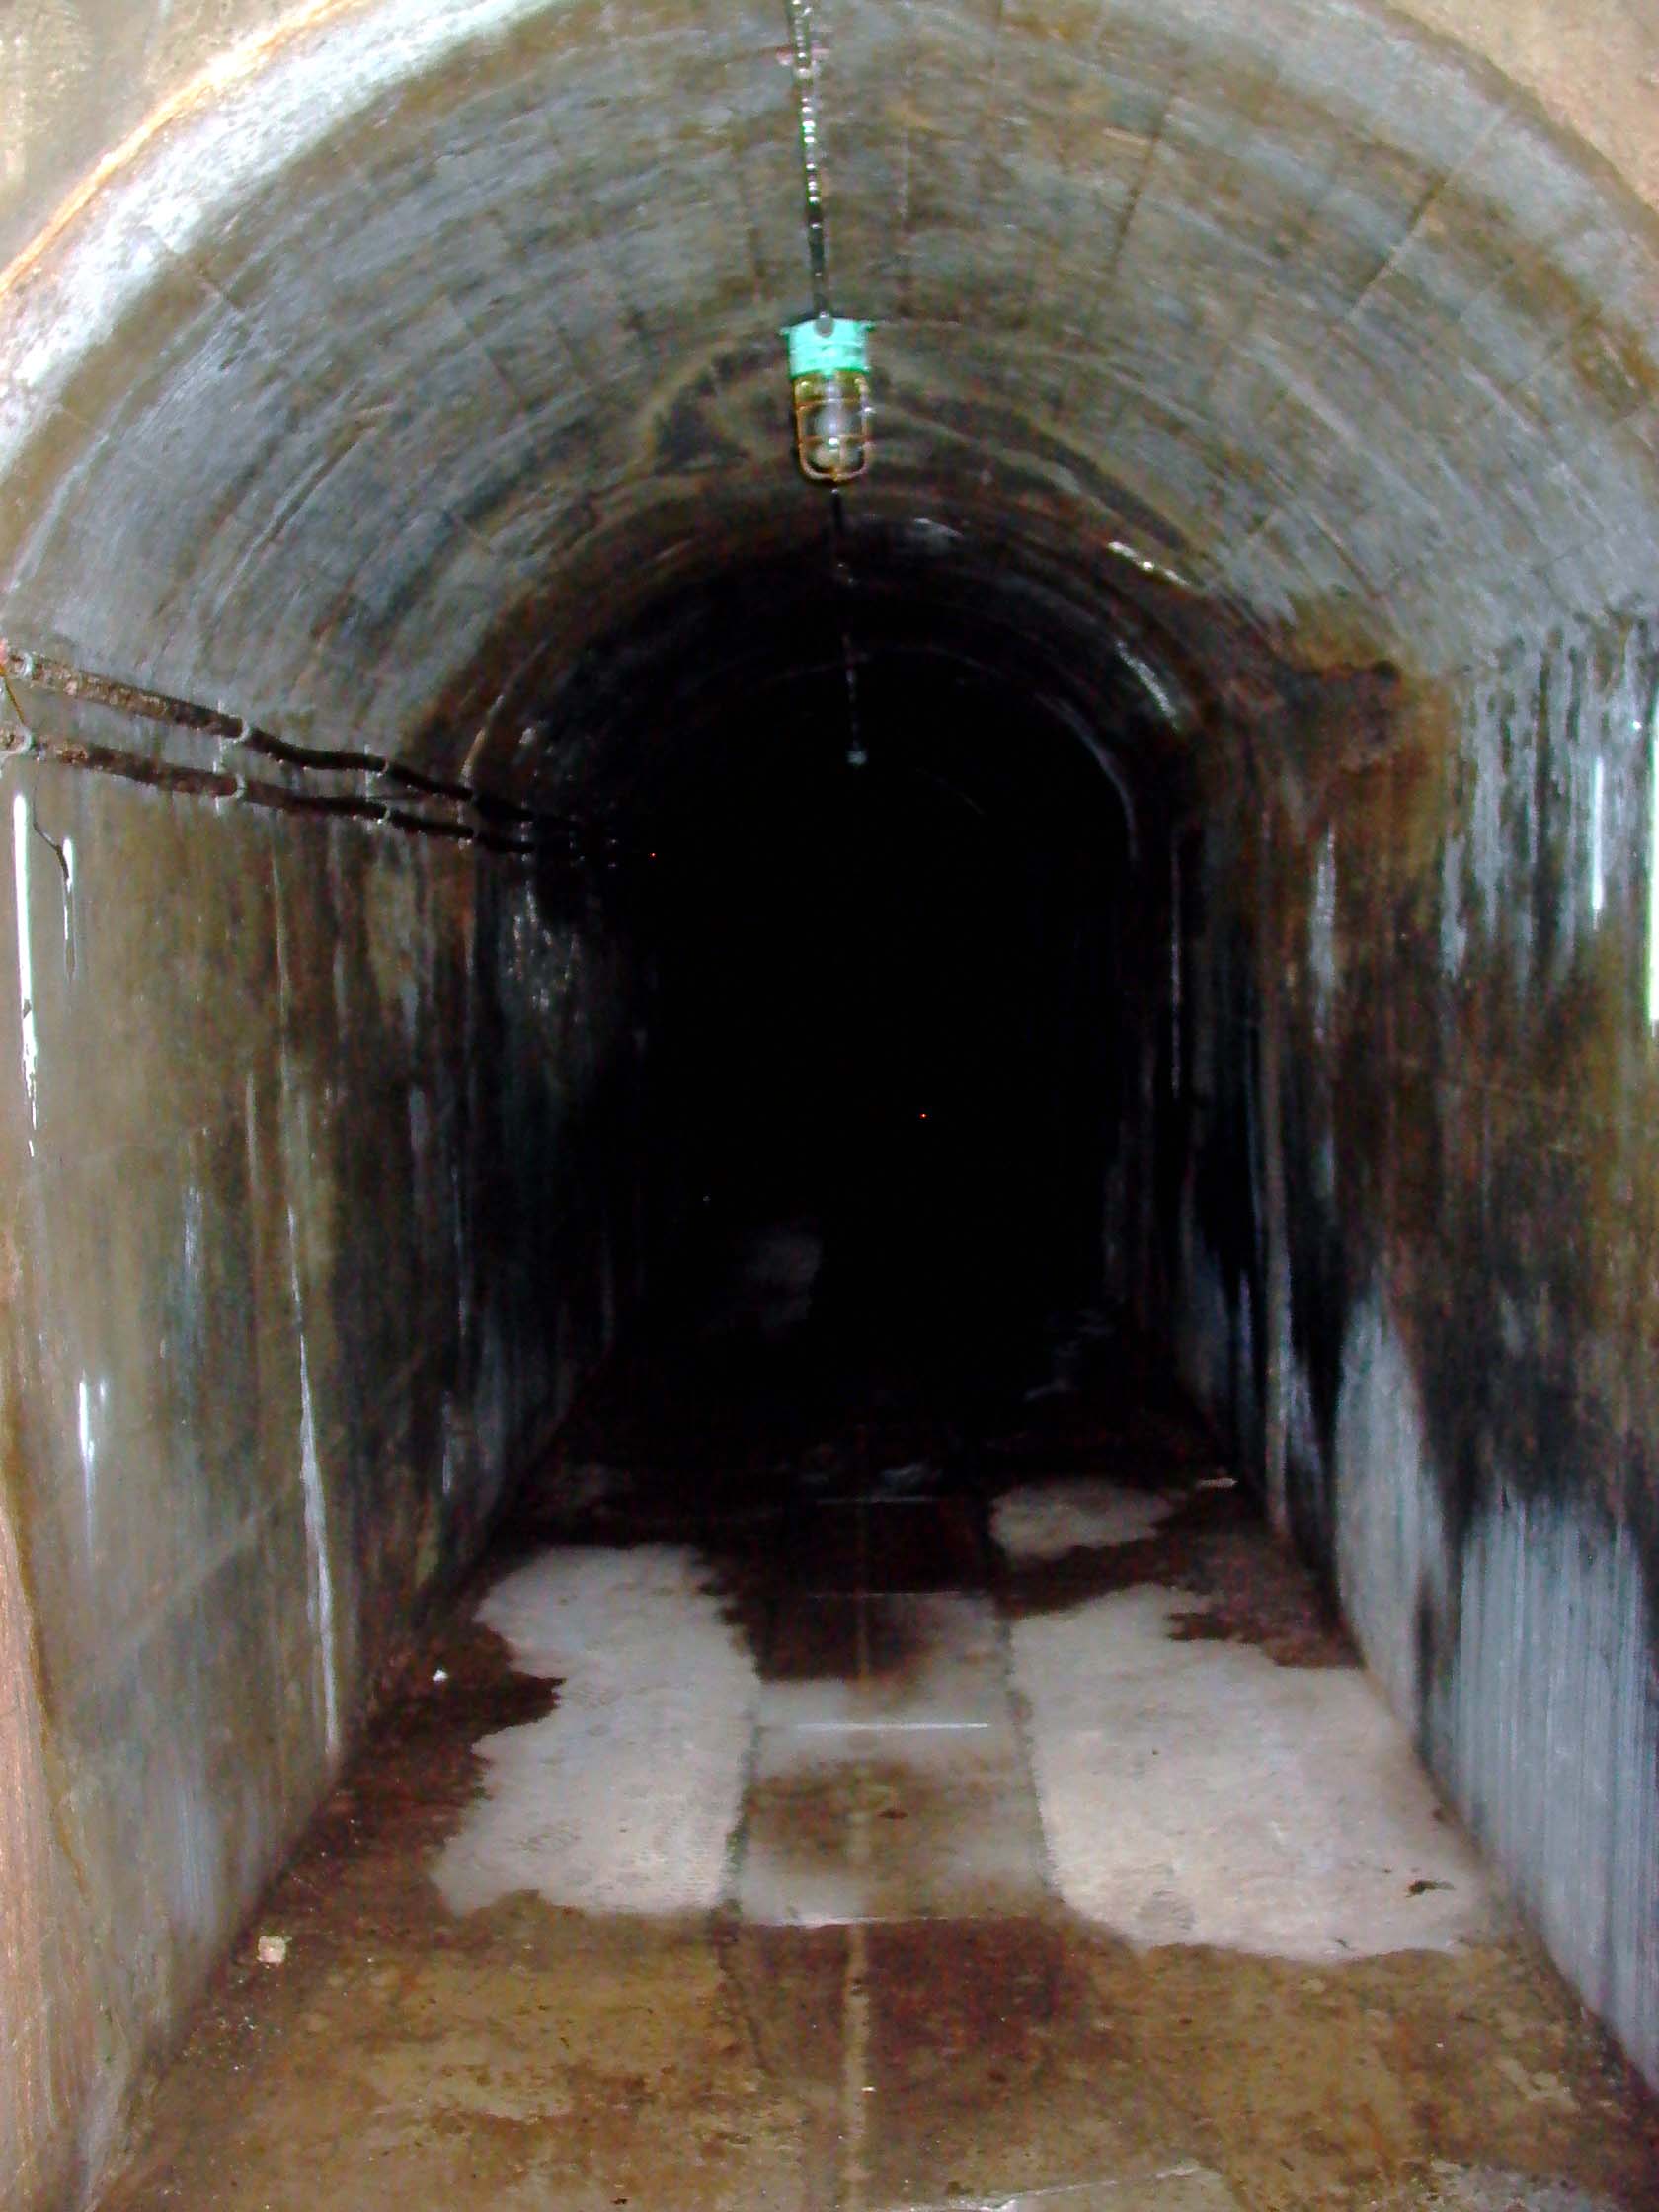
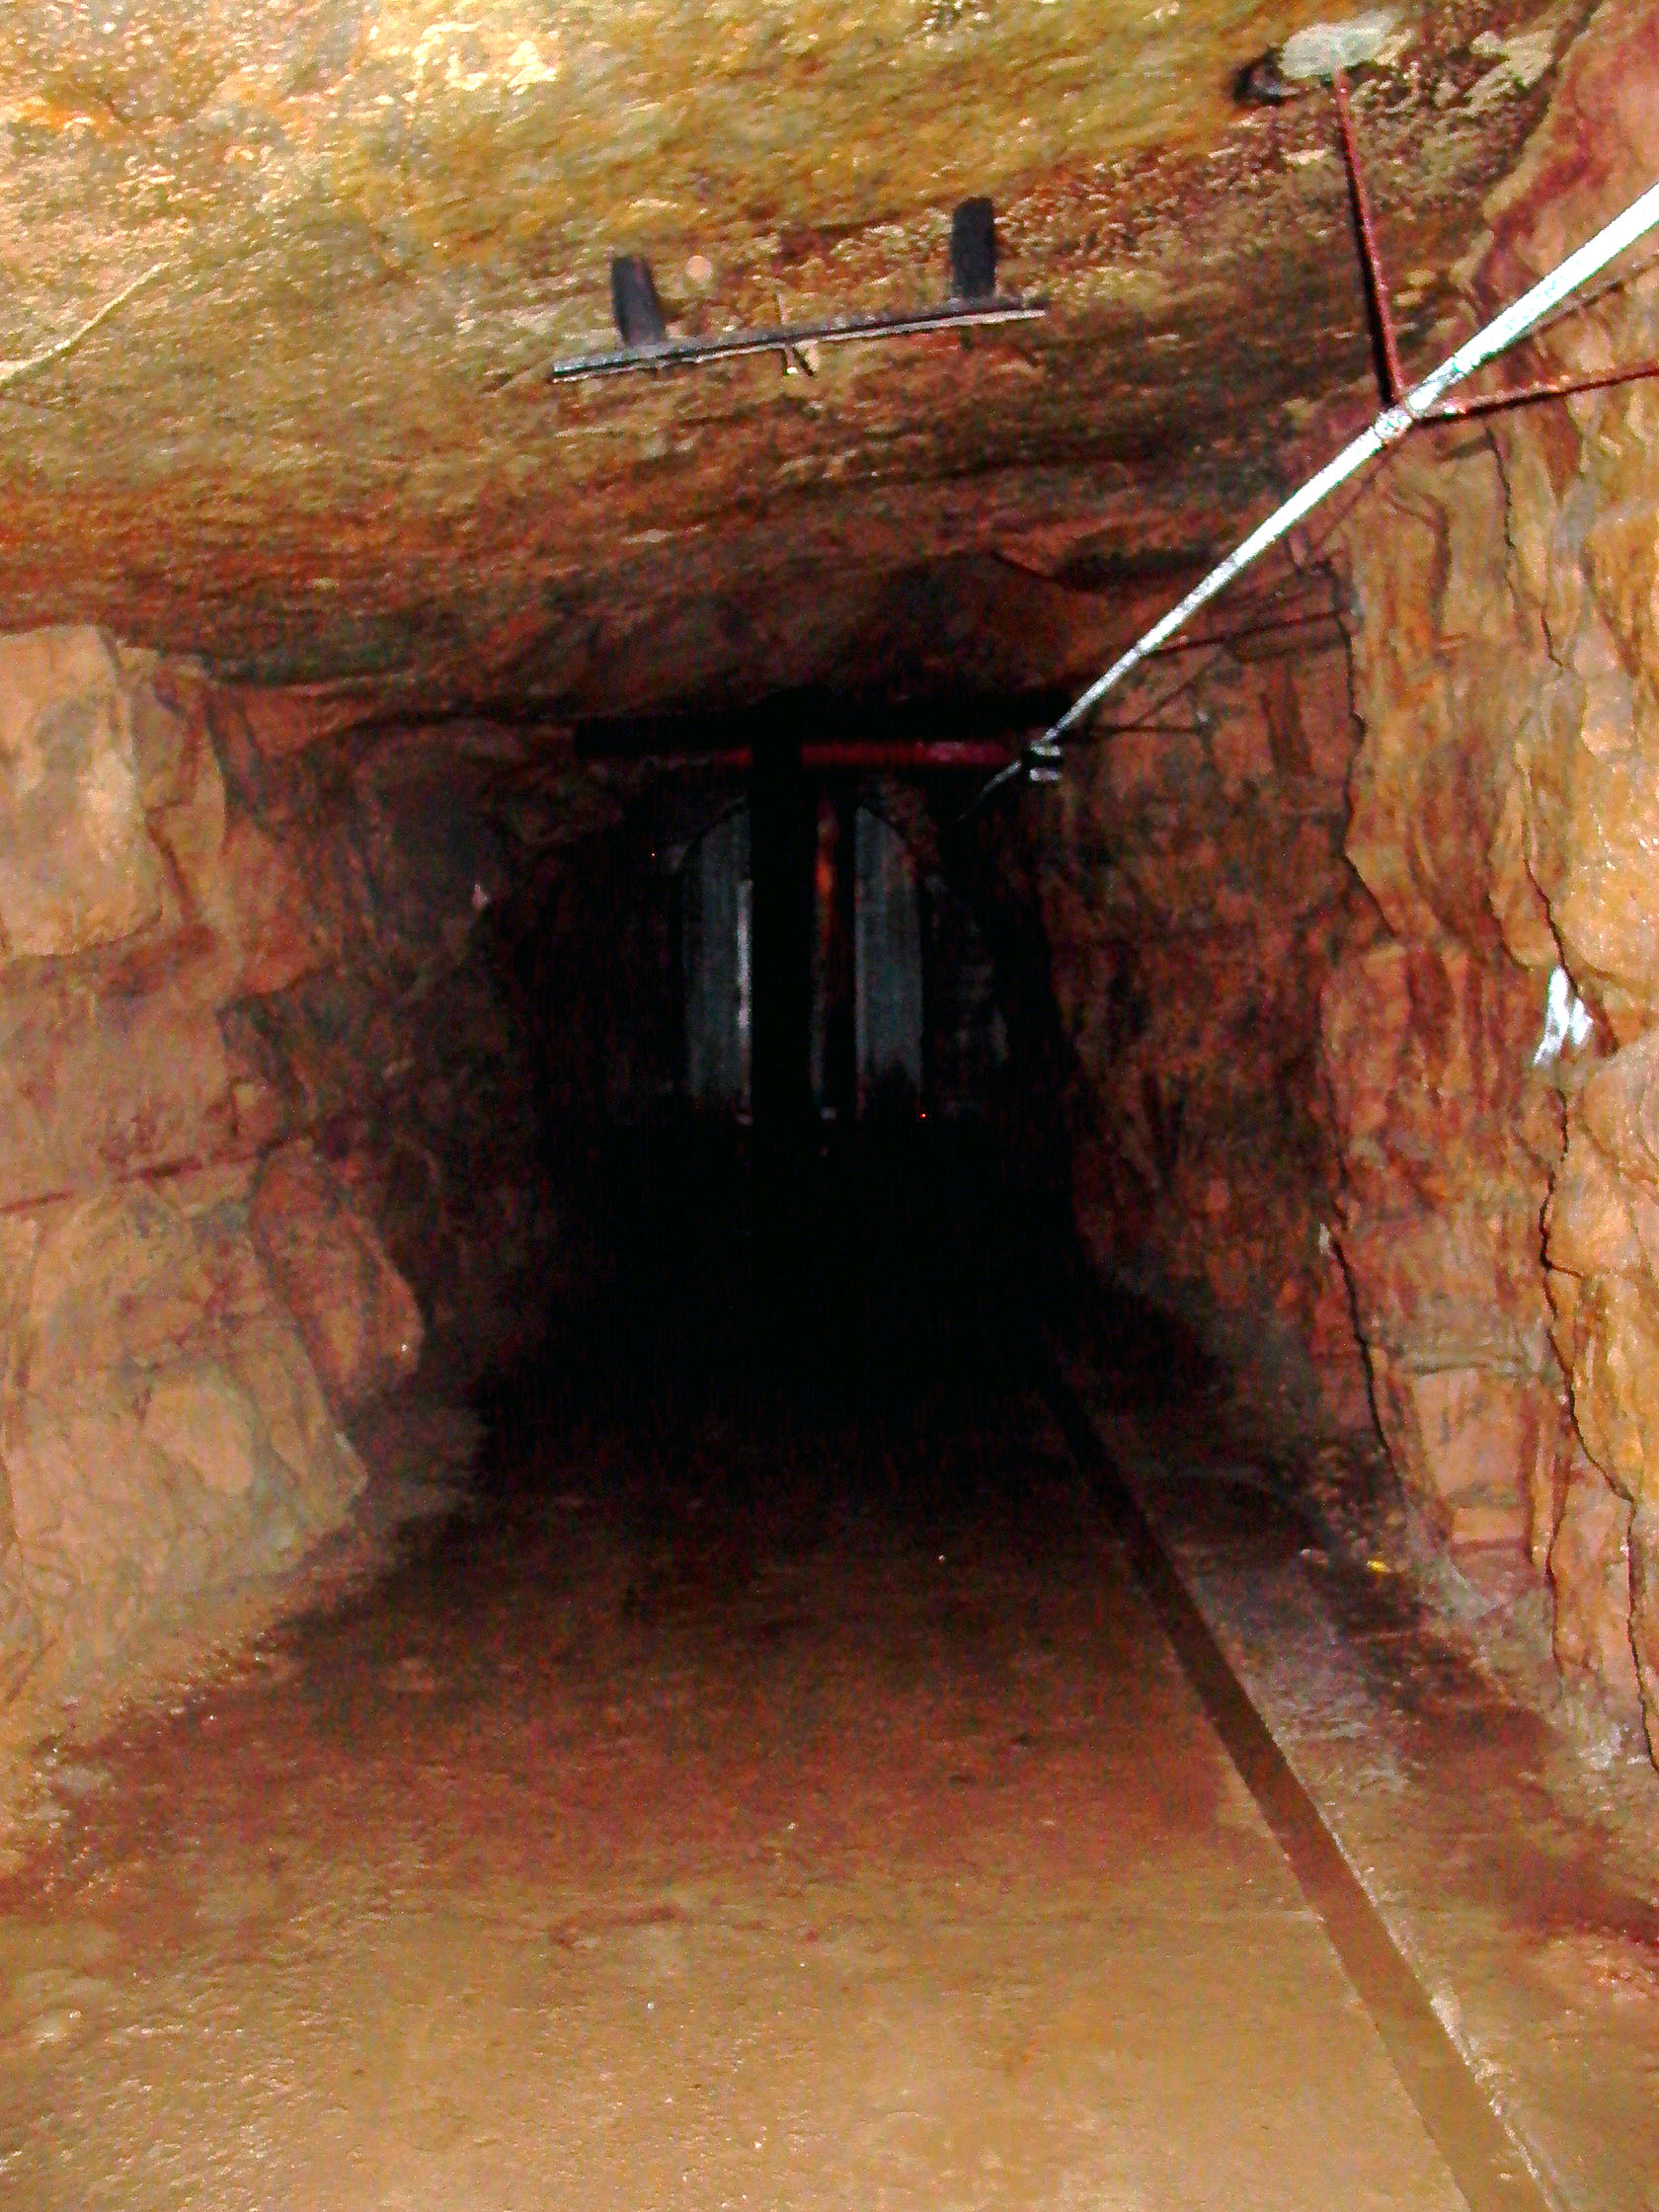
The small secondary portal tunnel disappears into the darkness... we follow
it:
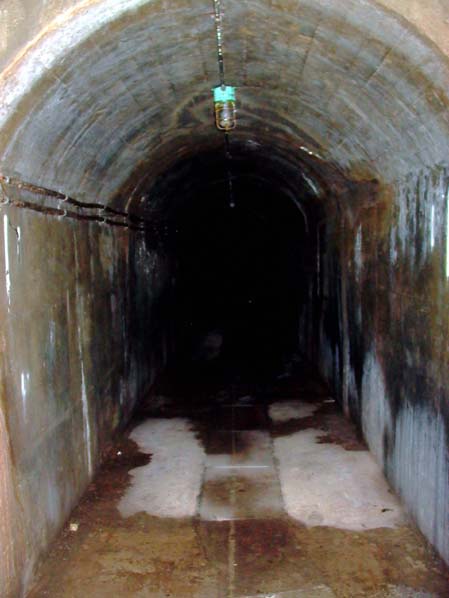
Photo: Inchindown - Secondary Portal
Photo by: Mike Ross
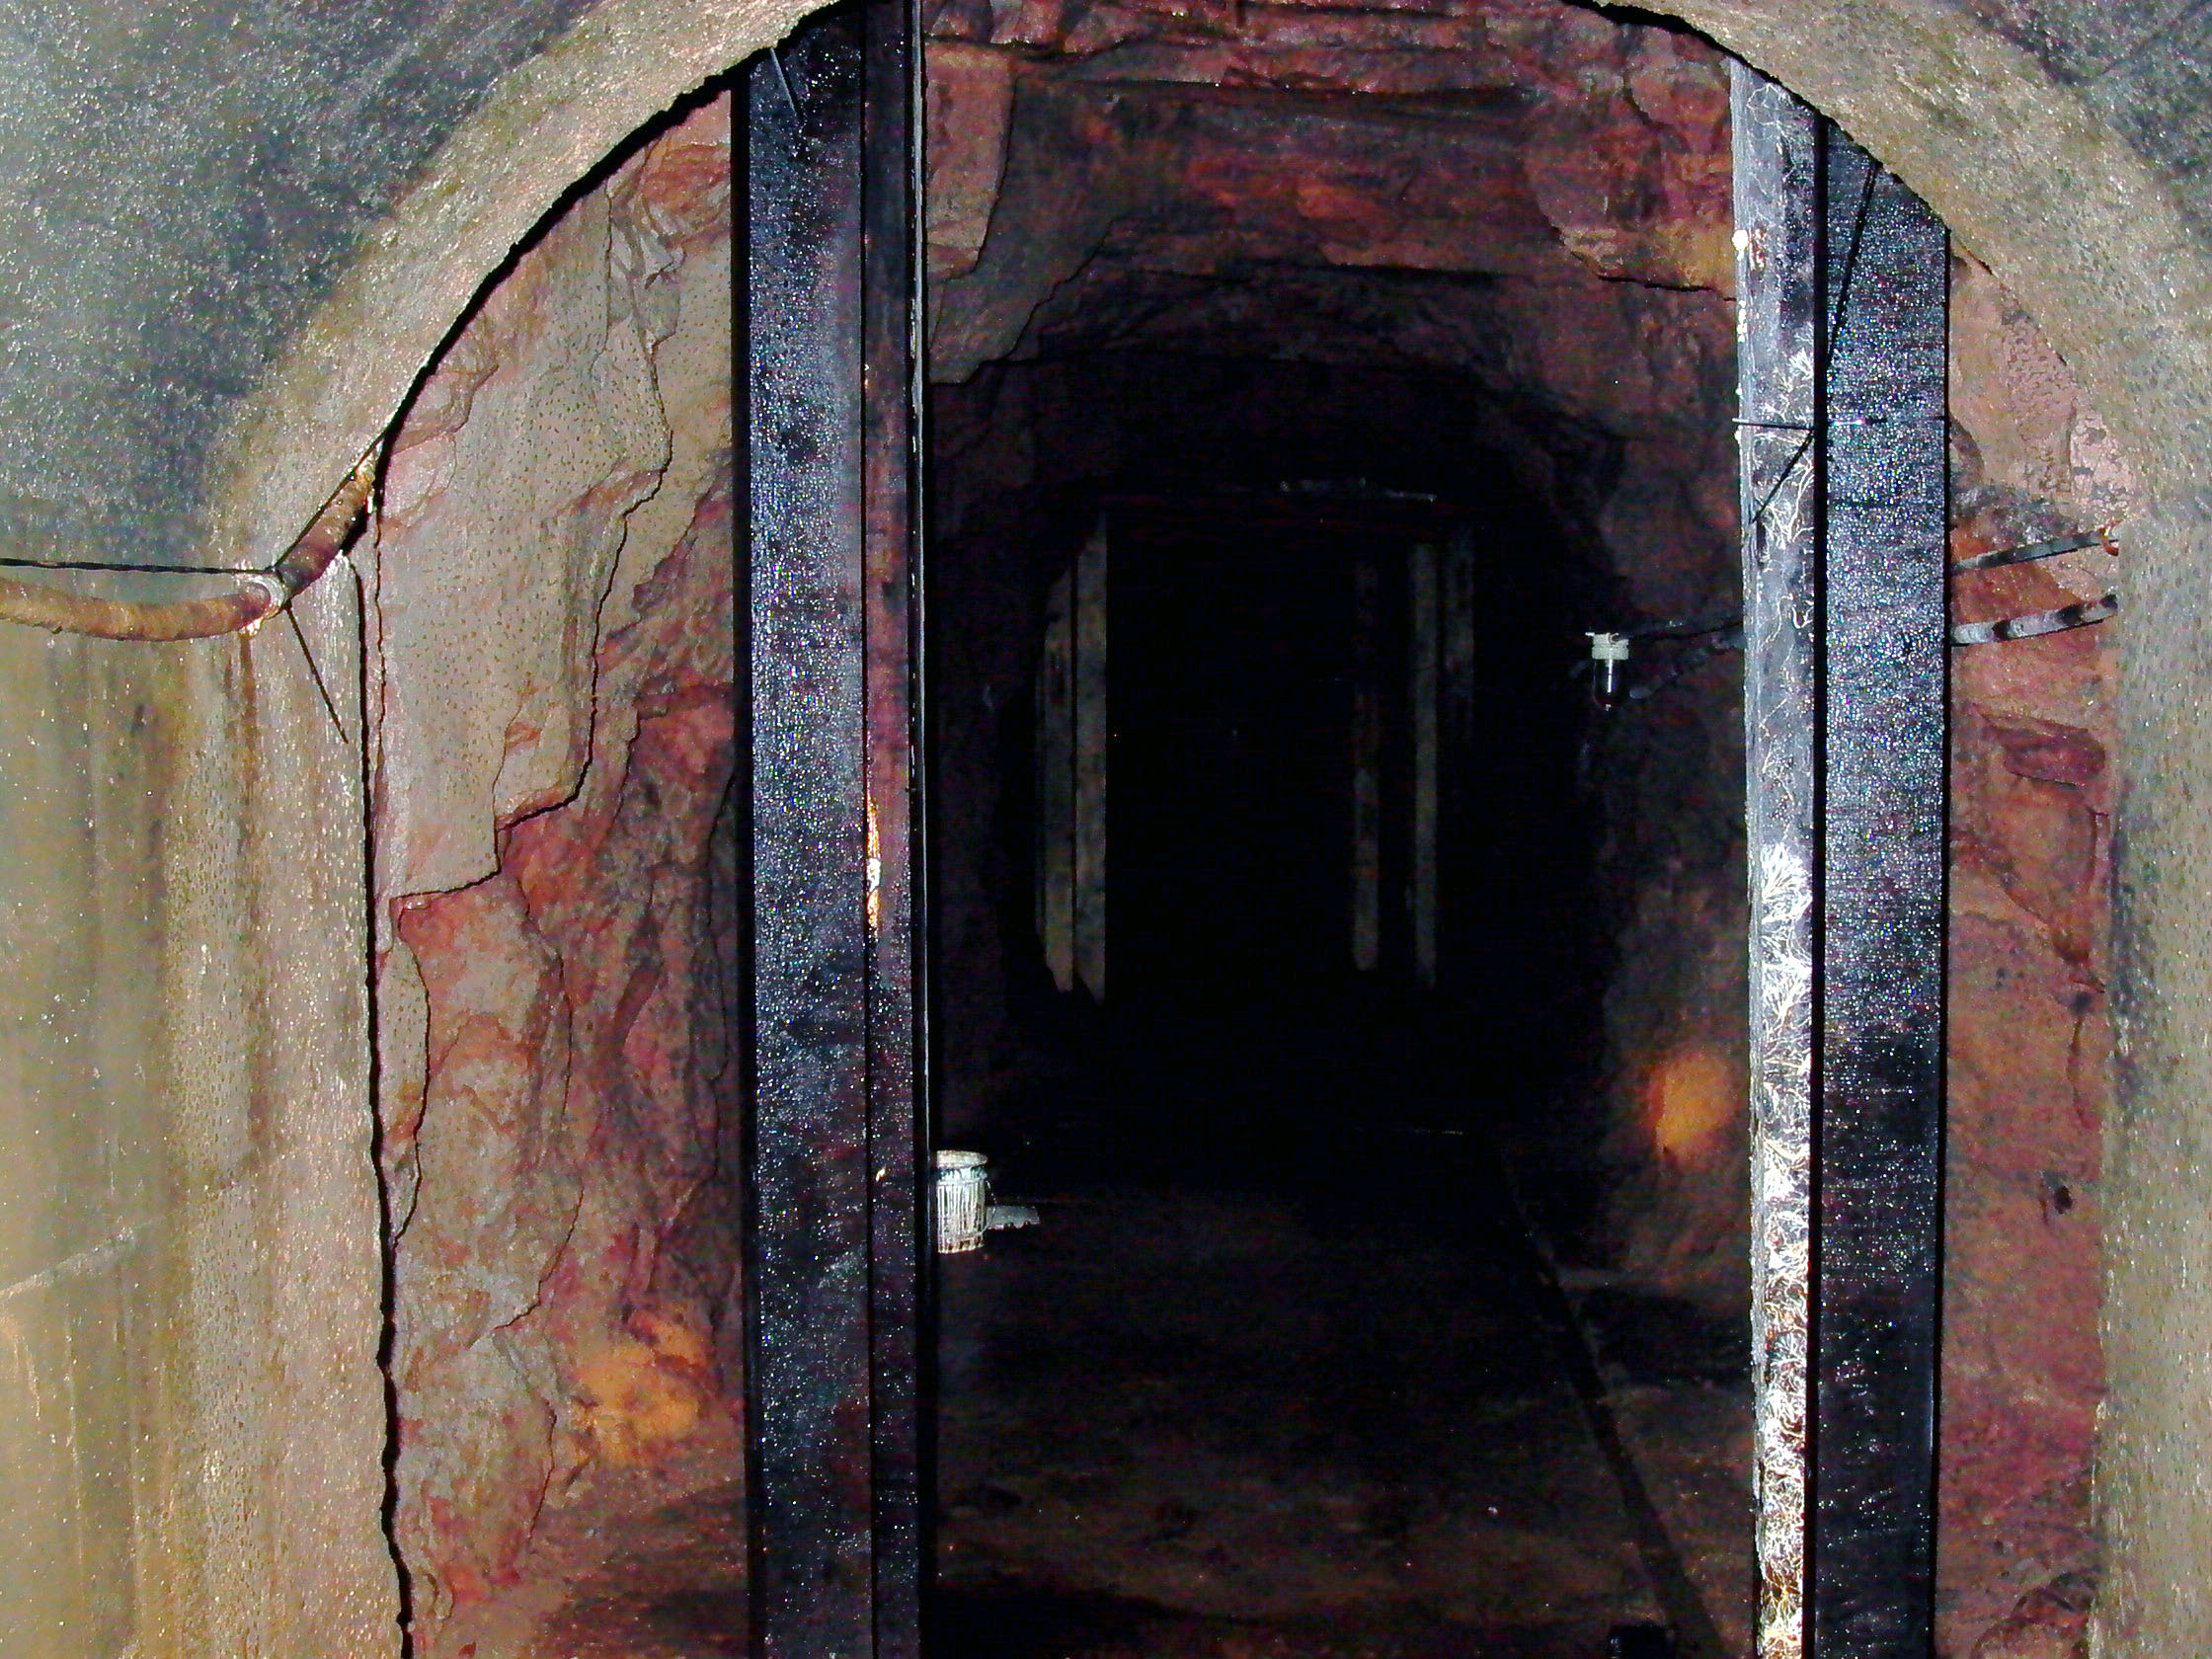
After around 230 paces (estimated), the concrete-lined section ends, and
the tunnel continues in sound unlined rock with occasional roof supports.
Note the 'modern' plastic bucket on the floor; there is evidence throughout
the complex of recent activity:
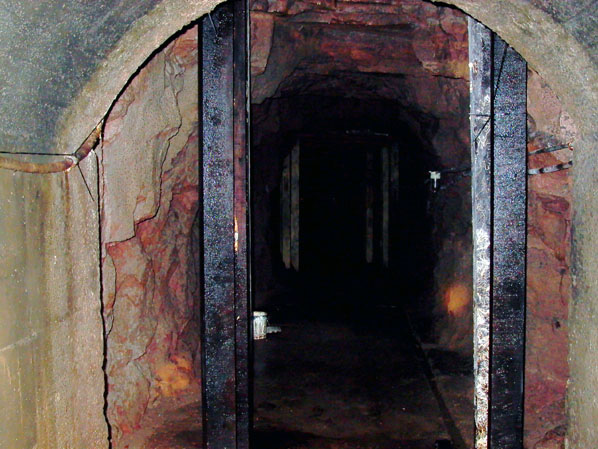
Photo: Secondary portal: end of lined section
Photo by: Mike Ross
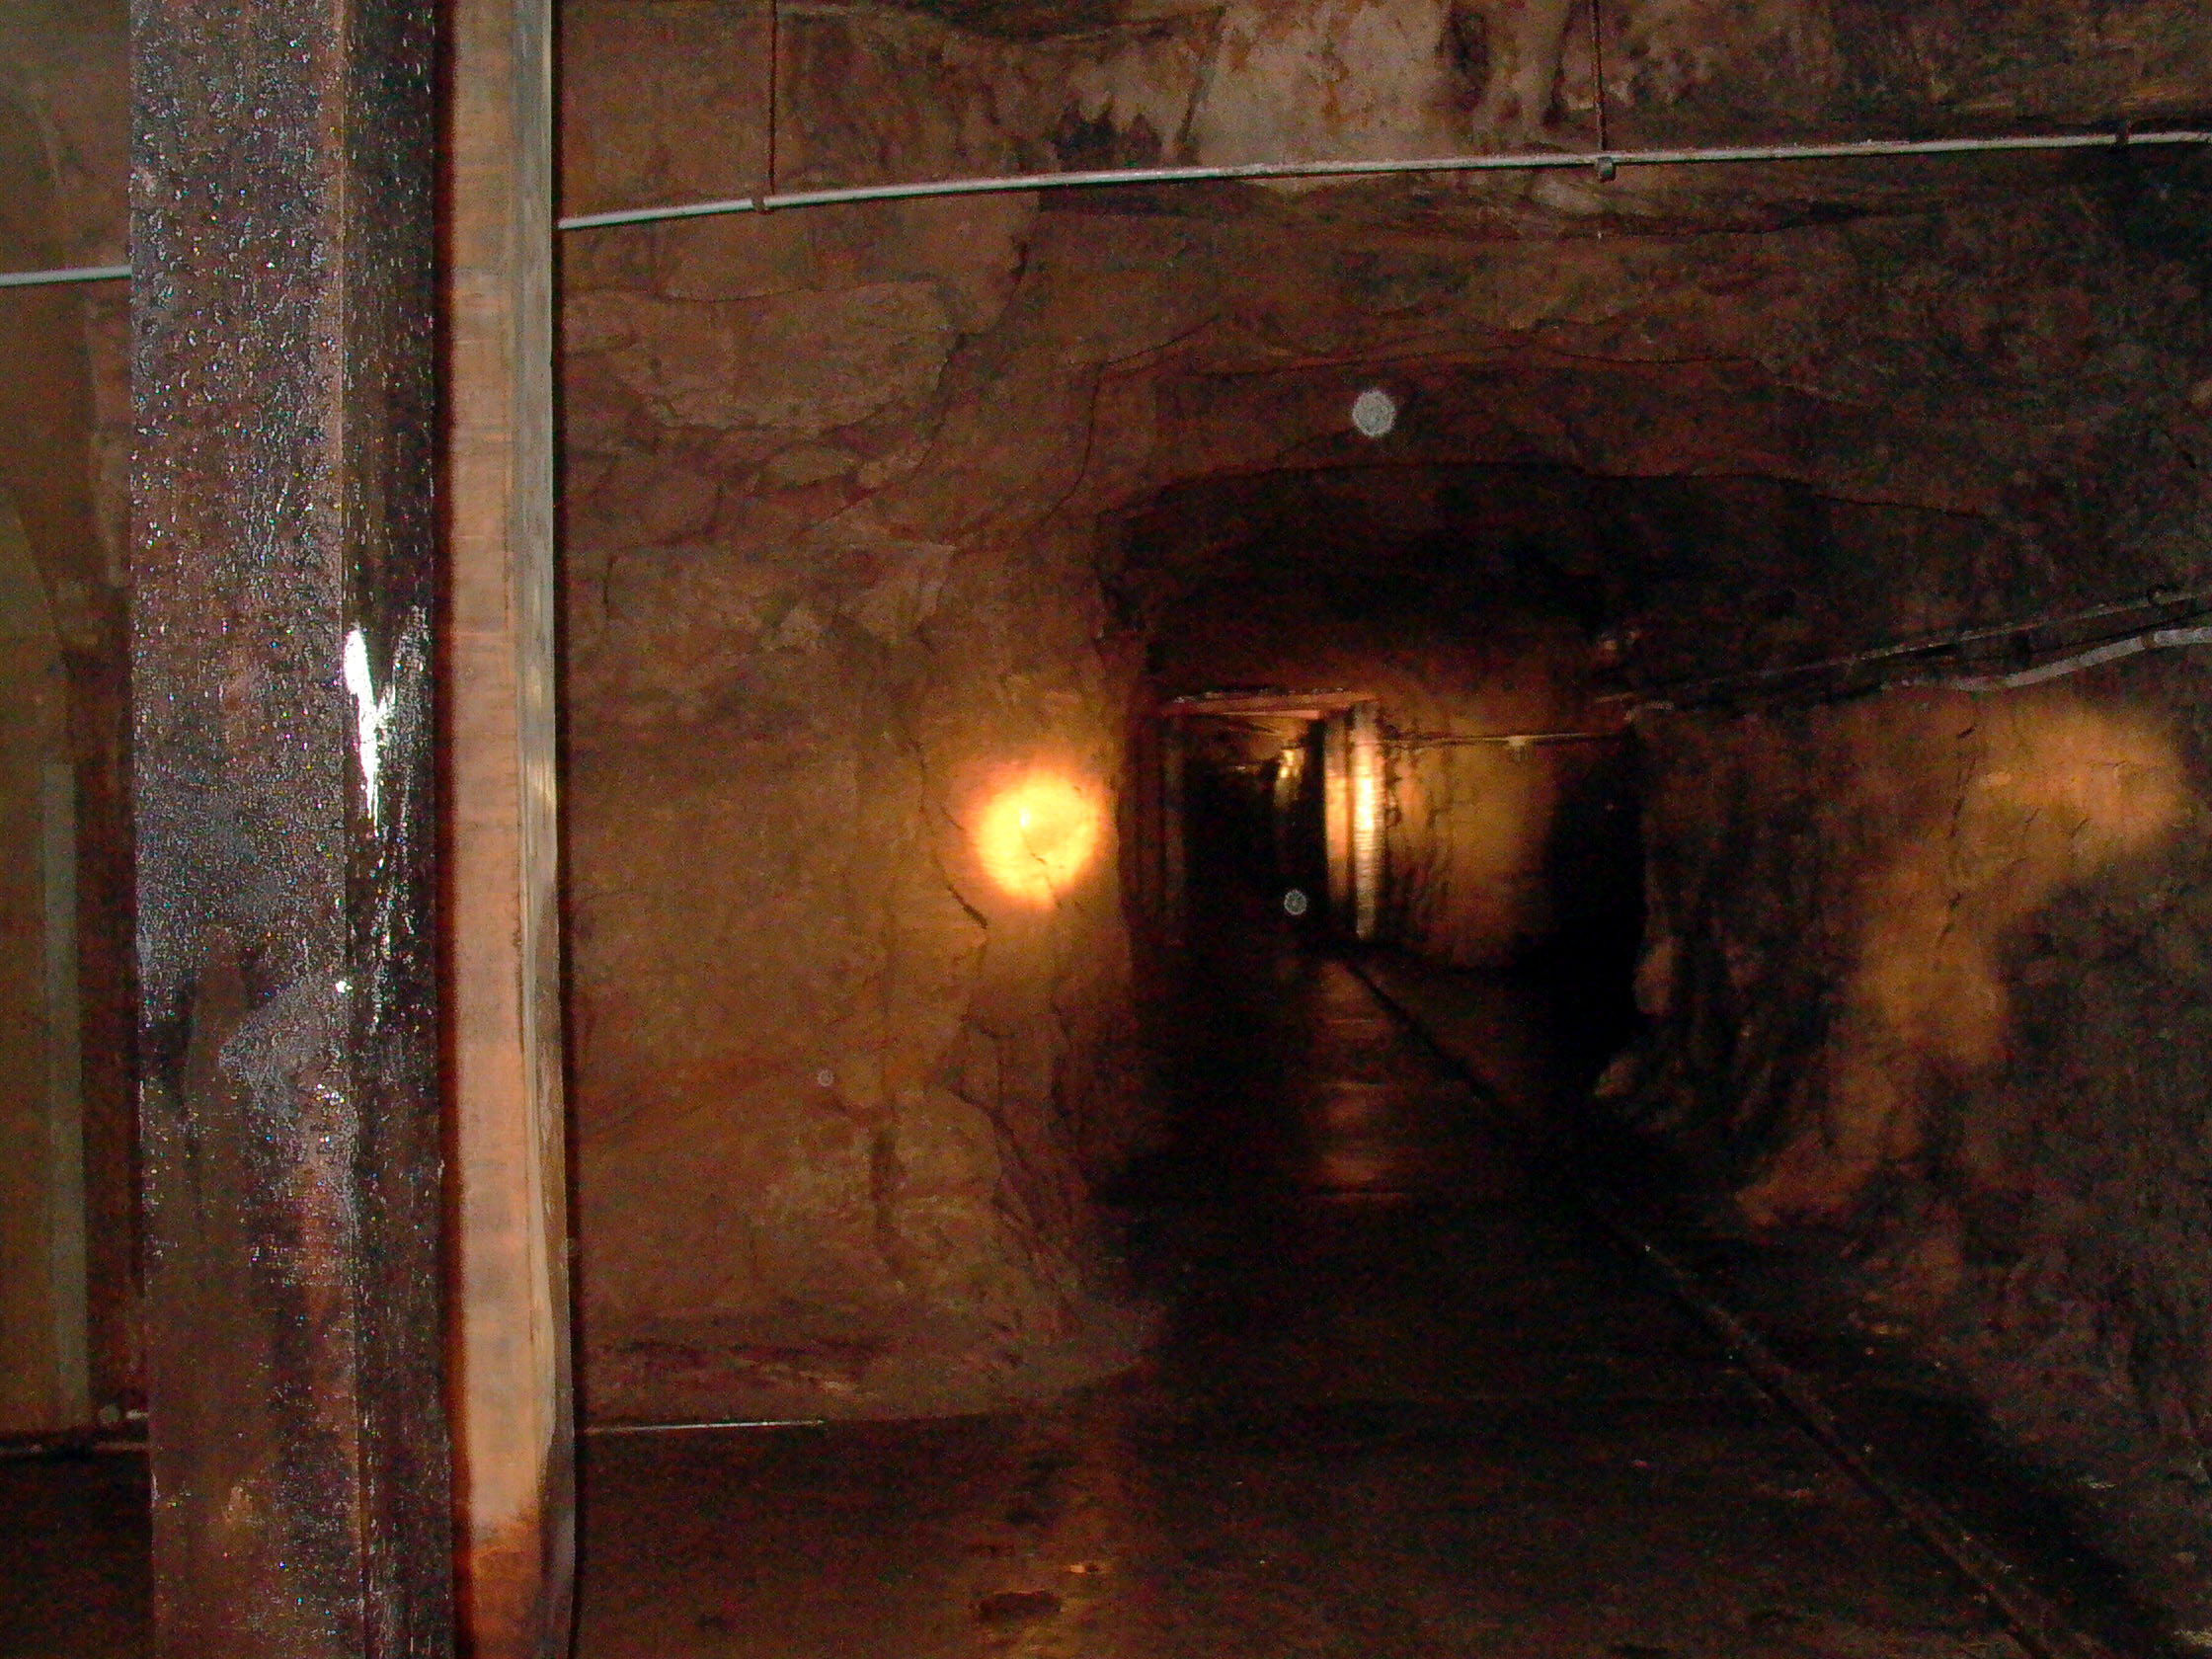
After another 20 paces or so, the tunnel turns sharp left. It continues
the same, unlined, with occasional roof supports, for around 170 paces.
There is an enlargement or alcove just visible on the right of the tunnel
in the photo below.
This is the gallery which gives access to the rear of the tanks:

Photo: Inchindown - Secondary portal: start of tank access gallery
Photo by: Mike Ross
After around 20-30 paces, a concrete-lined alcove opens on the left side
of the tunnel:
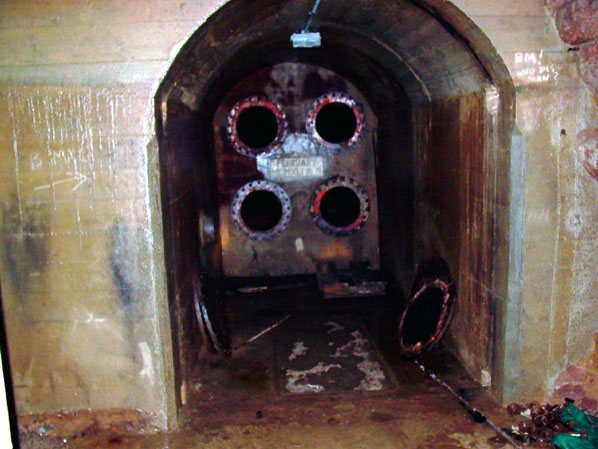
Photo: Inchindown - Secondary portal: access to first tank
Photo by: Mike Ross
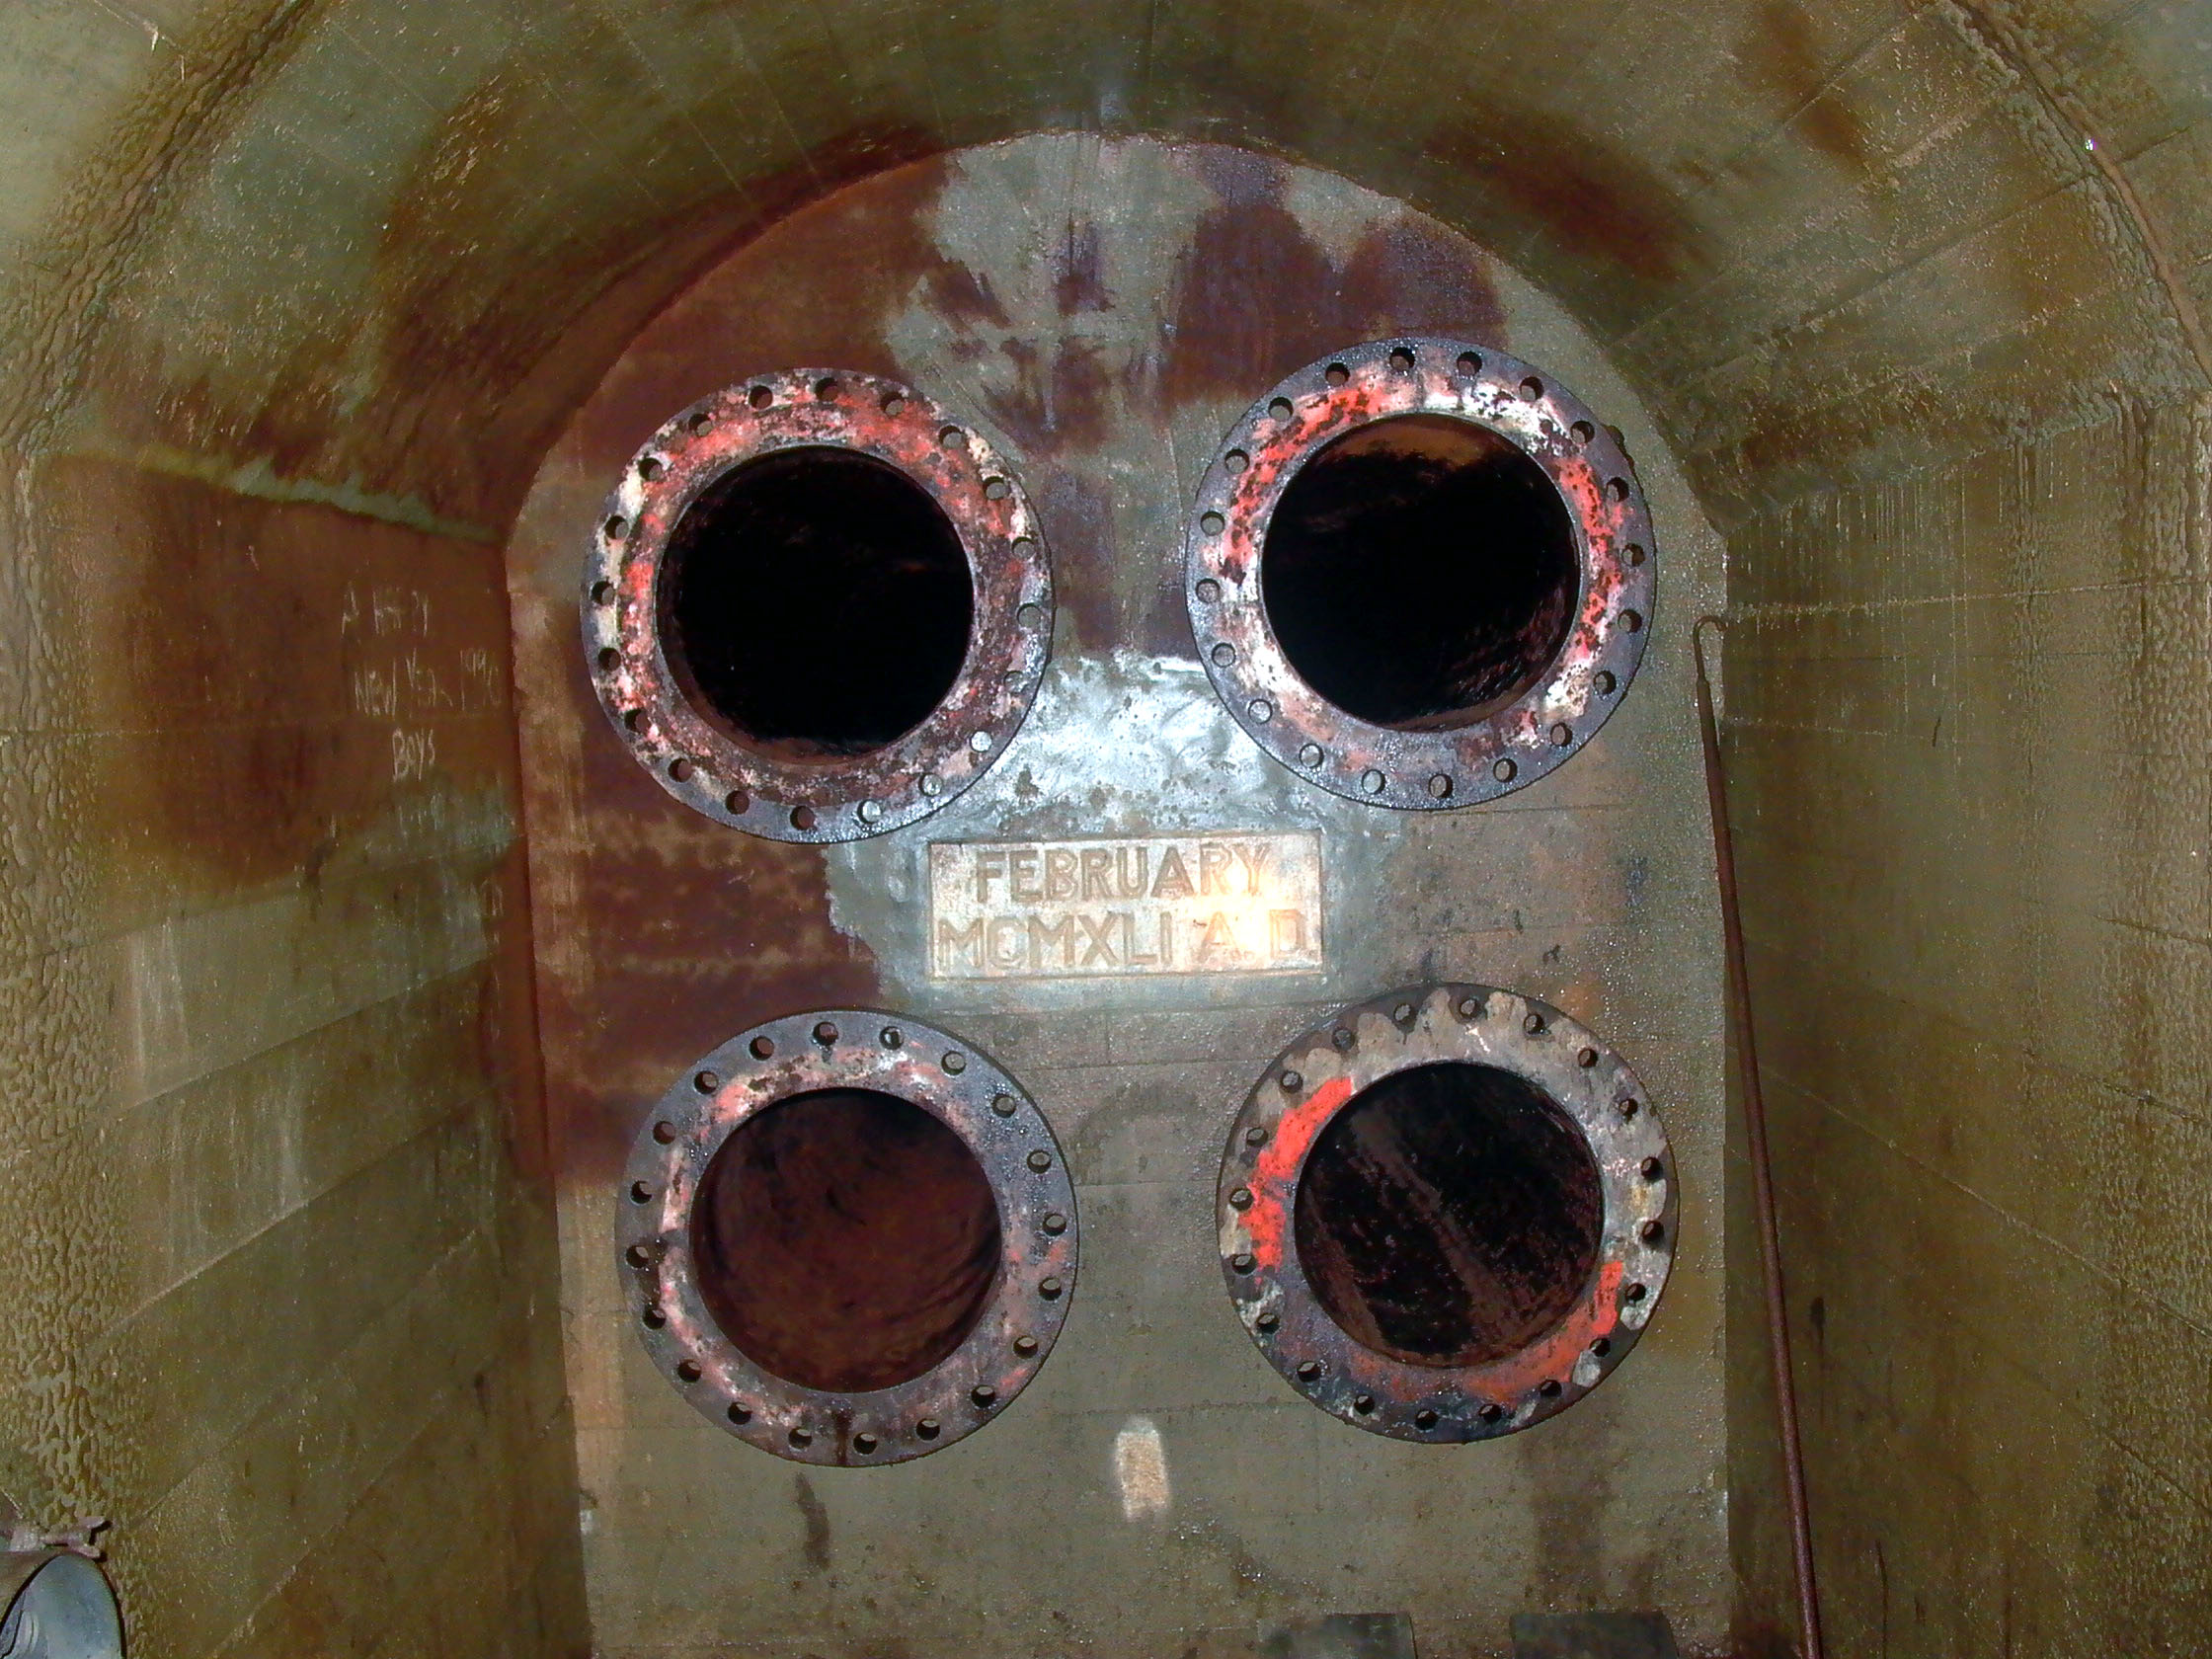
A concrete plug seals the end of one of the storage tanks. Four large pipes
lead through, their covers removed. The pipes seem to be around six feet
long. Whilst photography was impossible, shining a good light through the
pipes gave a view inside the tank, which appeared enormous - The 'Portsdown
Tunnels' site gives dimensions of 800 feet long by 35 feet in diameter
for the tanks there, and these appear to be on a similar scale.
'MCMXLI' translates to 1941.

Photo: Inchindown - Secondary portal: access to first tank
Photo by: Mike Ross
The tunnel continues, passing three more of these tanks. The others are
undated. Between alcoves, it's a plain unlined tunnel, a typical section
is shown below. After around 170 paces, the tunnel turns sharp left again....
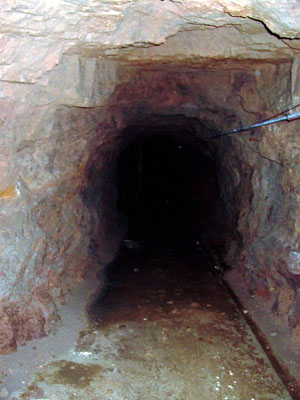
Photo: Inchindown - Secondary portal: tank access gallery
Photo by: Mike Ross
...following the sharp left turn, the tunnel runs on for only around 40
paces before a dead end comes into view:
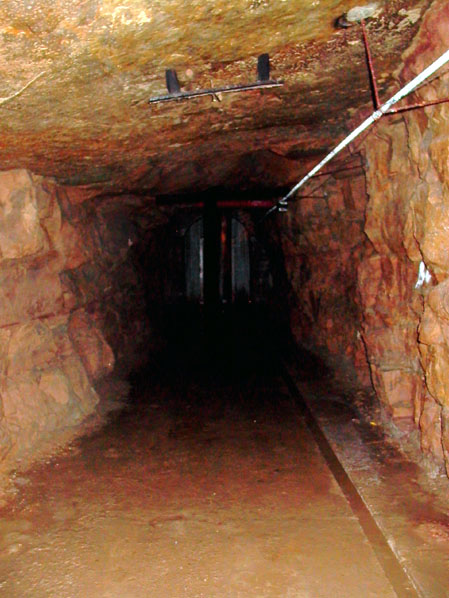
Photo: Inchindown - Secondary portal: tank access gallery
Photo by: Mike Ross
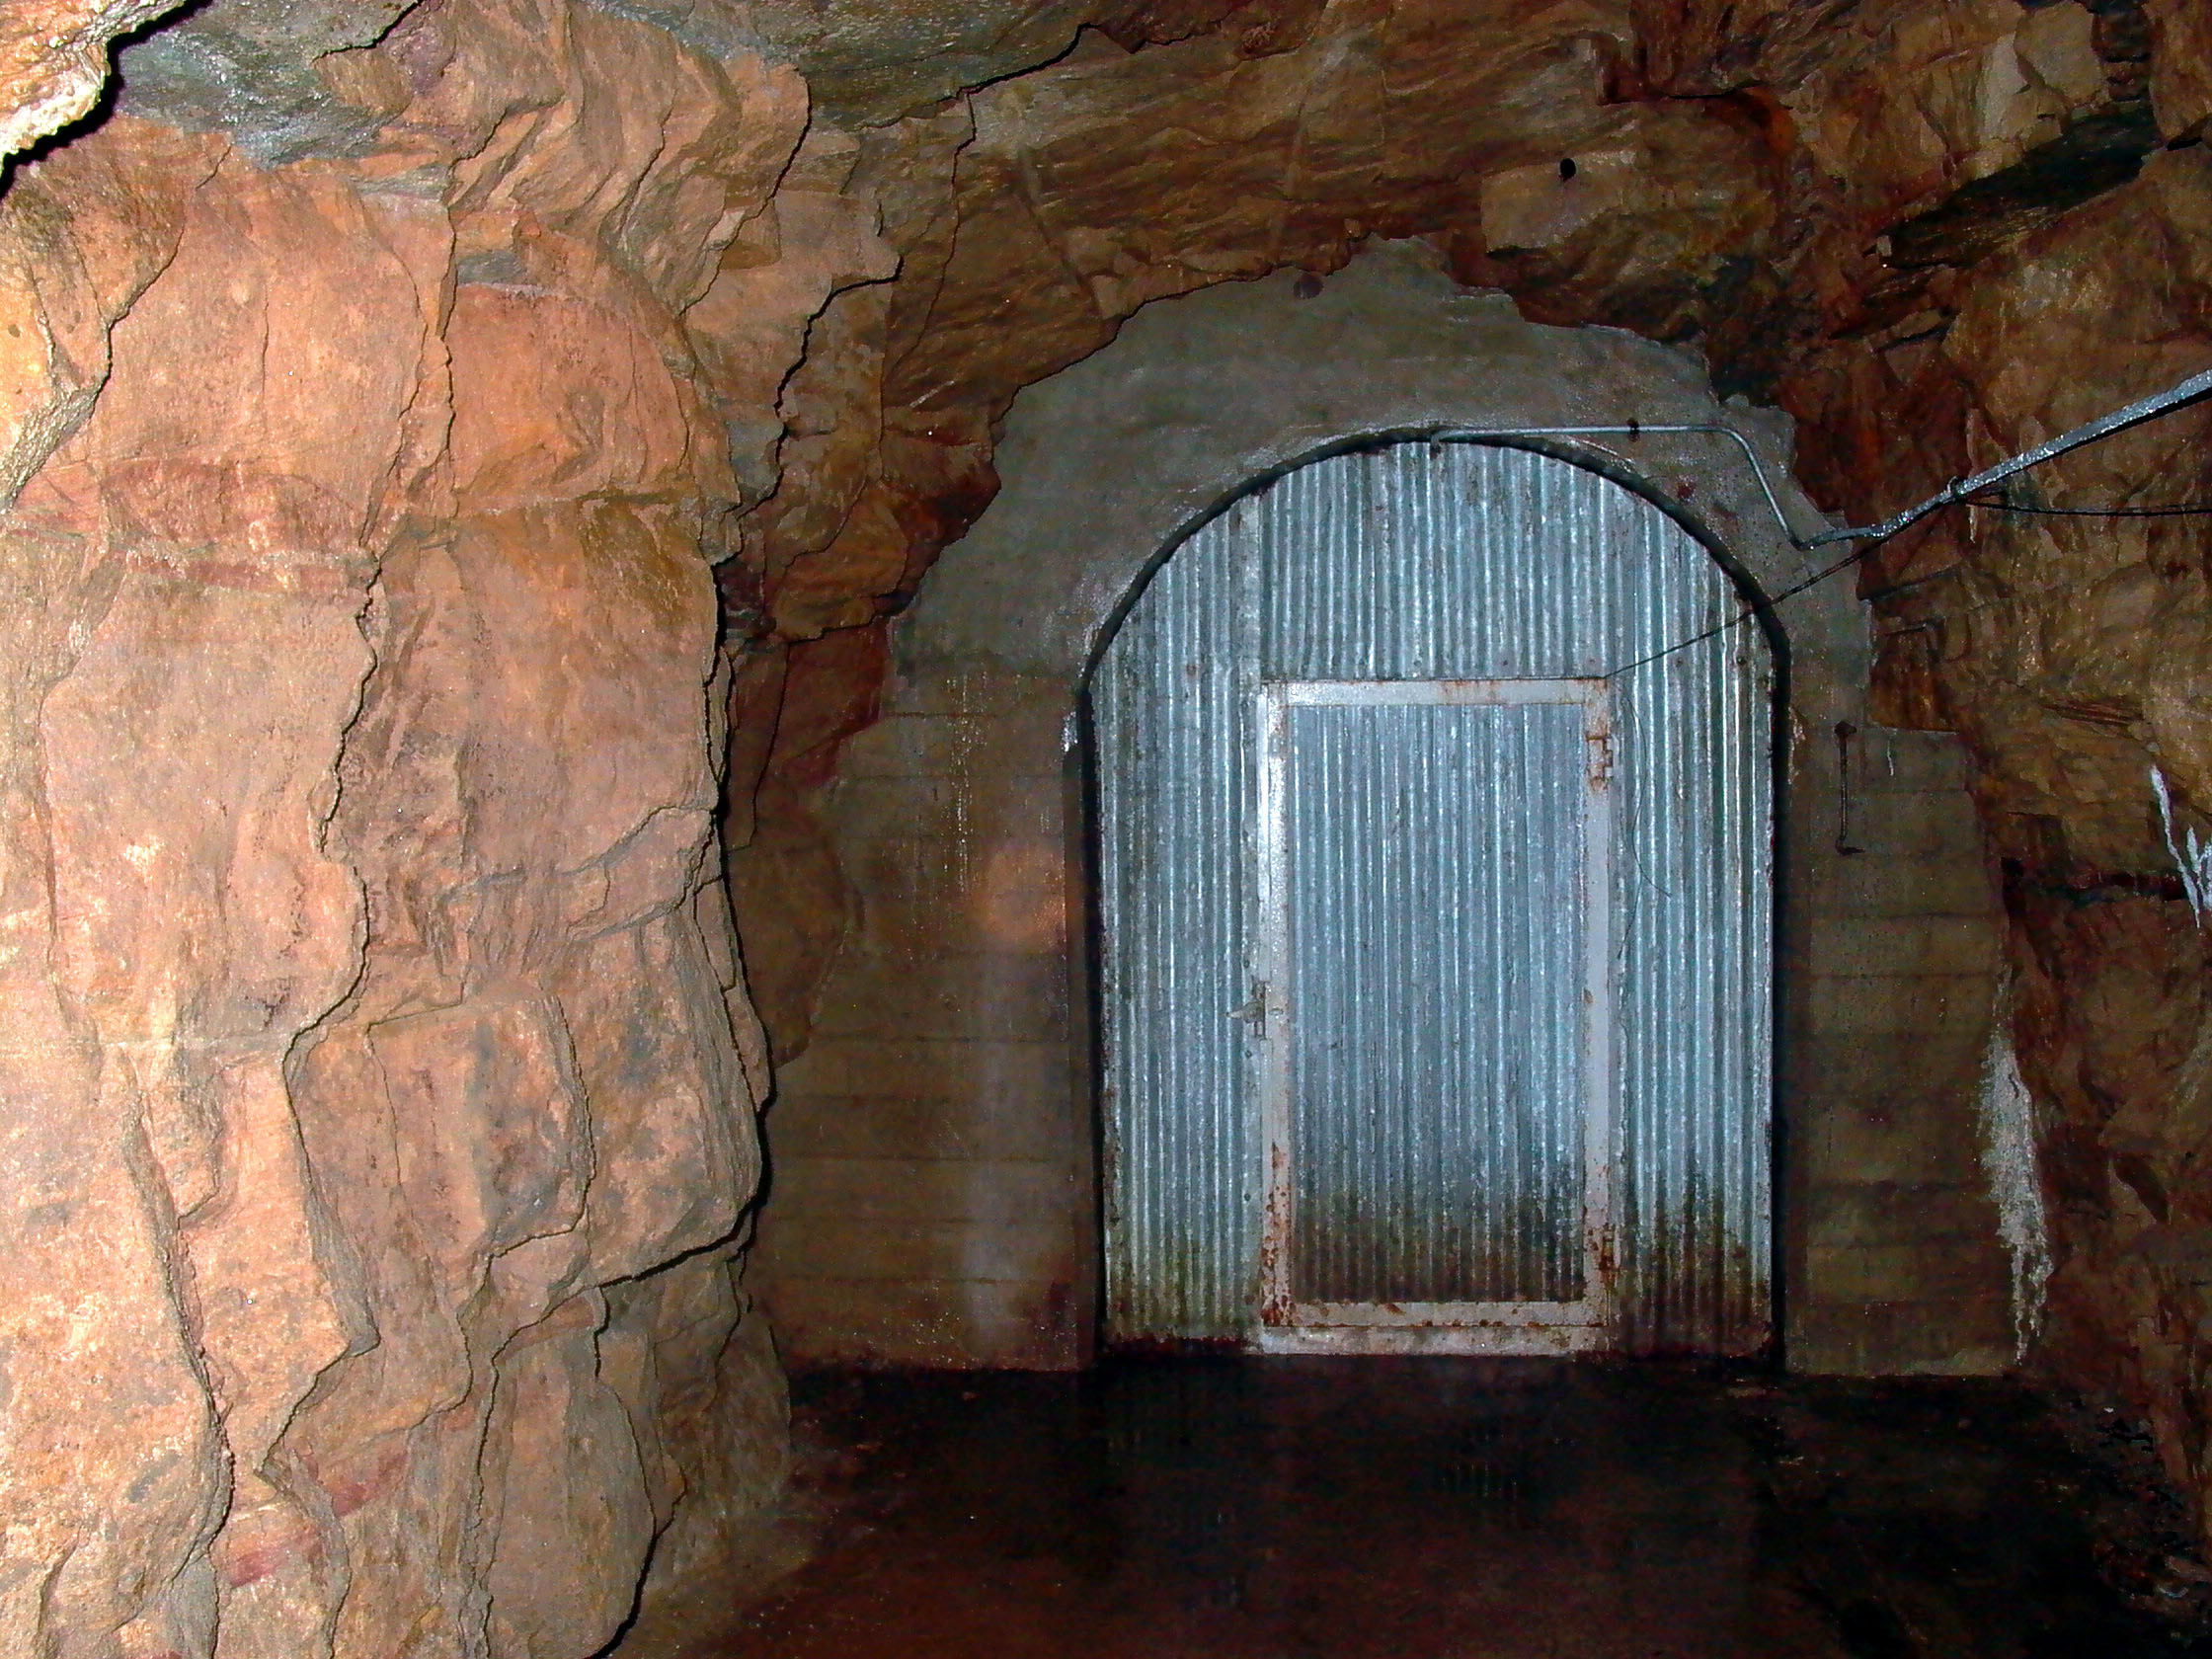
The dead end materialises as a concrete plug with a (?relatively recent?)
steel wall and door across it. Is it locked? Nope...
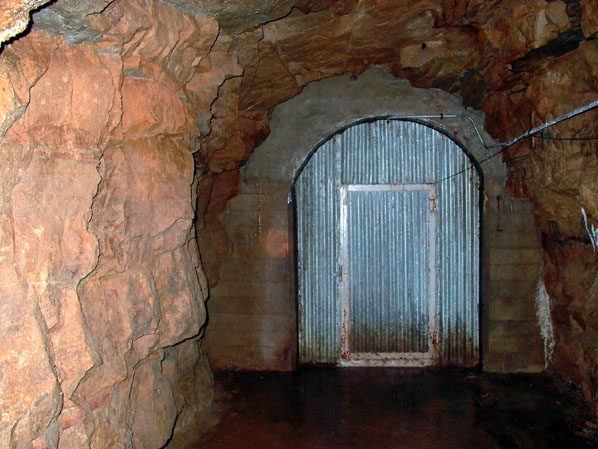
Photo: Inchindown - Secondary portal: tank access gallery
Photo by: Mike Ross
...inside... another tank access plug! Not what I expected. I imagined
it was pretty much inevitable that this secondary portal tunnel would somehow
loop round and provide a 'back door' to the main portal tunnel. I may have
missed something due to the very quick & dirty nature of the exploration,
but it seems it isn't built that way at all.
This tank access plug has a fair range of graffitti with dates from late
80's through to 2003. Also note the interesting trolley with a curved bed,
presumably shaped so as to facilitate passing tools and materials through
to the tank.
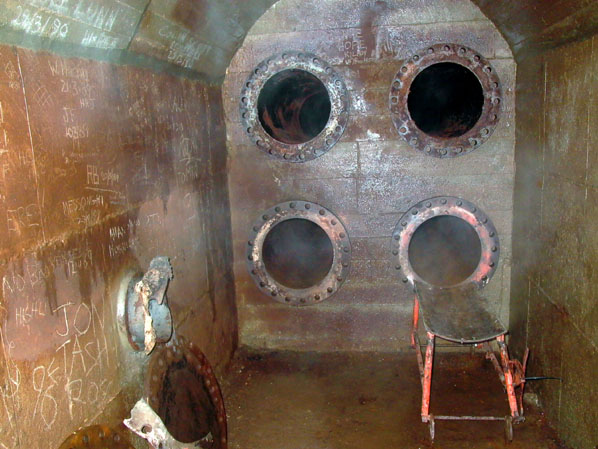
Photo: Inchindown - Secondary portal: tank access gallery
Photo by: Mike Ross
A speedy return was then made to the entrance - my father was acting as
'top man' for this penetration, and I didn't want to keep him waiting!
On the way I snapped this conjunction of ancient & modern electric
equipment. There's clearly still work going on here. I looked in again
at the surface switchroom, and looking more closely the meters were modern
LCD devices - in fact there was a postcard on the floor from Scottish &
Southern saying 'we've changed your meters' dated April 2003...
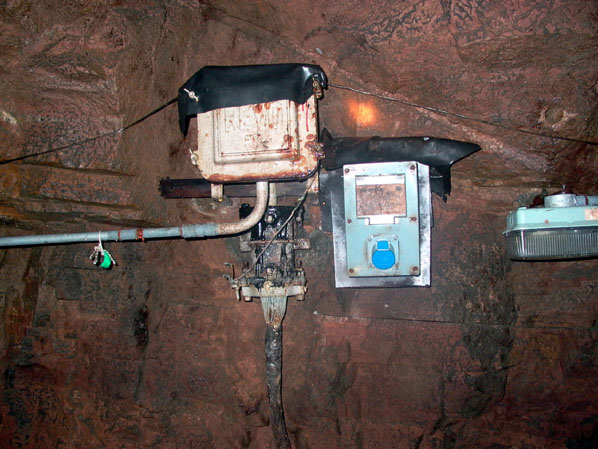
Photo: Inchindown - Secondary portal: tank access gallery
Photo by: Mike Ross
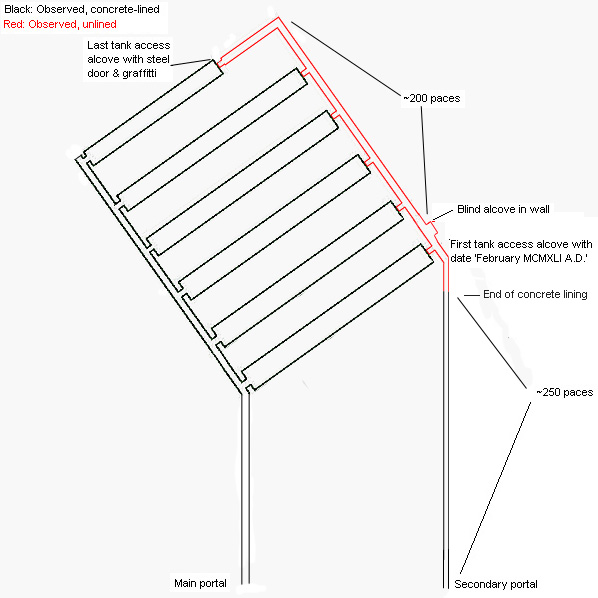
Returning to the surface, a quick & dirty pacing exercise enabled the
following conjectural/sketch survey to be produced. Compare this with the
OS map on the Inchindown front page, and the Portsdown plan on the Portsdown
page. The '170 paces' for the length of the tank access gallery just about
squares with the ~200m distance between portals measured from the Canmap/OS
map.
I'd certainly be interested in any thoughts, comments, conjectures, or
further information!
Inchindown - Sketch survey.
Illustration by: Mike Ross
Home Page
Last updated 25th September 2003
Style © 1998-2001 Subterranea Britannica
Words and images © 2003 Michael J. Ross

|